

Today I will tell you how to connect your local server with a live domain, for this, you need 3 things to do
- Web server and website setup on your computer you can use ( XAMMP, WAMPP, MAMPP )
- A Static IP with port 80 forwarded
- DNS Setup, for Fee SSL you can use Cloudflyer
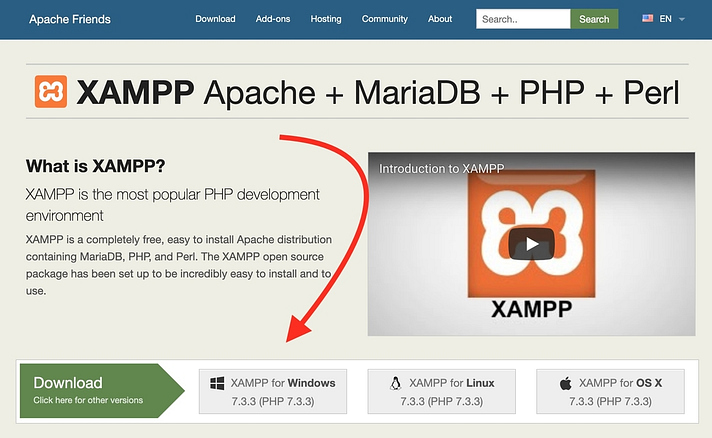
The first step on your way to install WordPress locally is to download and install the XAMPP software. You can download the Windows installer file from Apache Friends. It’s a big file, about 110 MB, so it might take a minute or so depending on your connection:
Once the download finishes, run the file you downloaded to launch the XAMPP installer. If you’re running antivirus software, you might get a warning like this:
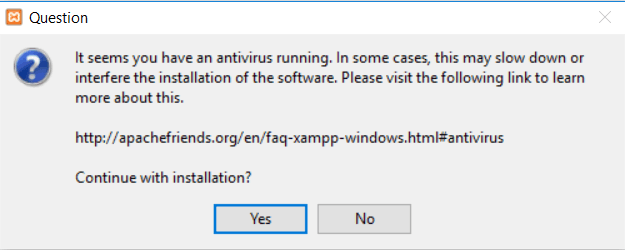
Just click Yes to continue. Depending on your Windows configuration, you might also get a prompt about User Account Control (UAC). Just continue through that prompt as well. Once you get through all of the prompts, you should see the standard installer screen:

Just click Next to continue.
On the next screen, you can choose which components to install. To install XAMPP and WordPress, you do not need all of the components. In addition to the required components, all you need are:
- MySQL
- PHPMyAdmin
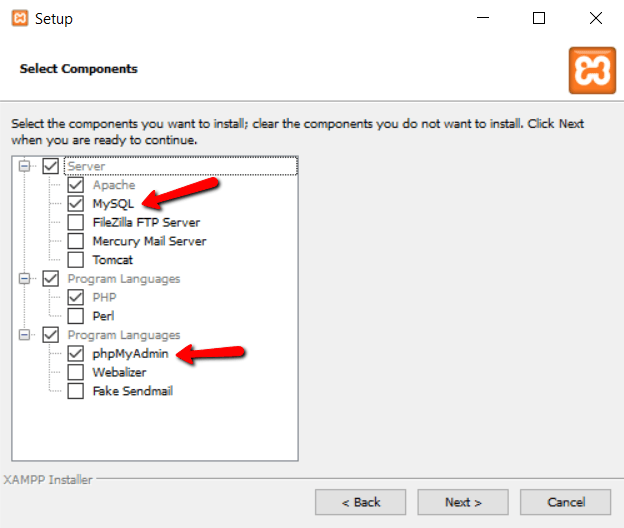
Again, this is all that’s needed to install WordPress locally. Uncheck everything else and click Next.
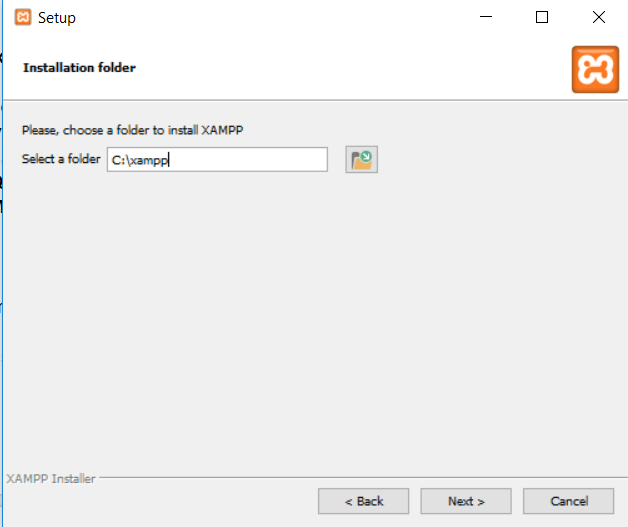
You can now select which folder to install XAMPP in. I always leave it as the default:
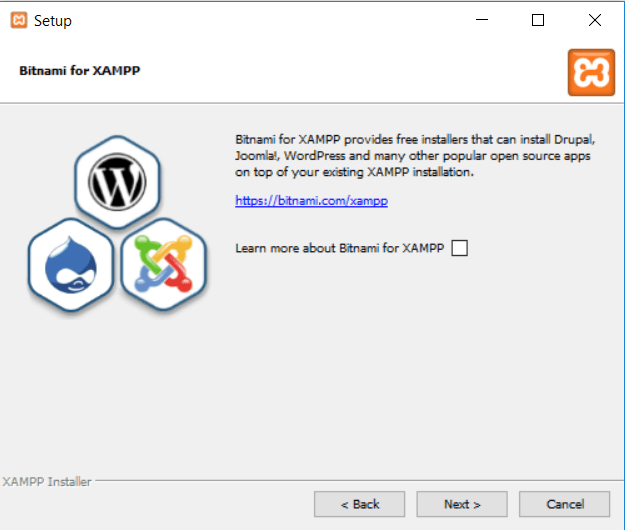
On the next screen, you’ll get a prompt asking you to install Bitnami for XAMPP. You do not need this to install XAMPP and WordPress, so just uncheck the box:
Once you click Next, you’re ready to run the install:
The install process might take a few minutes:
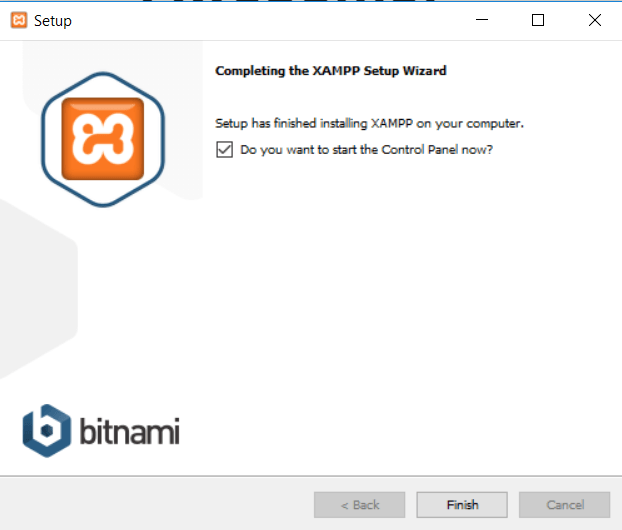
Once it finishes, you can launch the control panel to start working with XAMPP:
Step 2: Start the modules and test your server
To install XAMPP and WordPress properly, you’ll need to run two modules:
- Apache
- MySQL
You can start both modules from the XAMPP control panel:

Once you launch them, you should see their status turn to green:
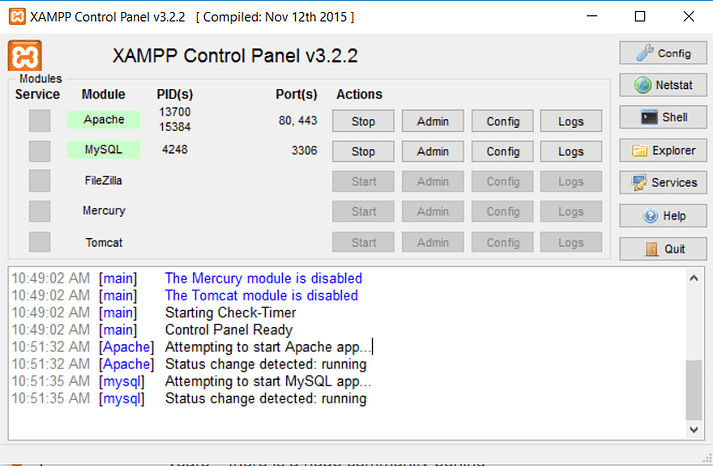
And now you should be able to test that your local server is working by going to http://localhost/ in your web browser of choice:
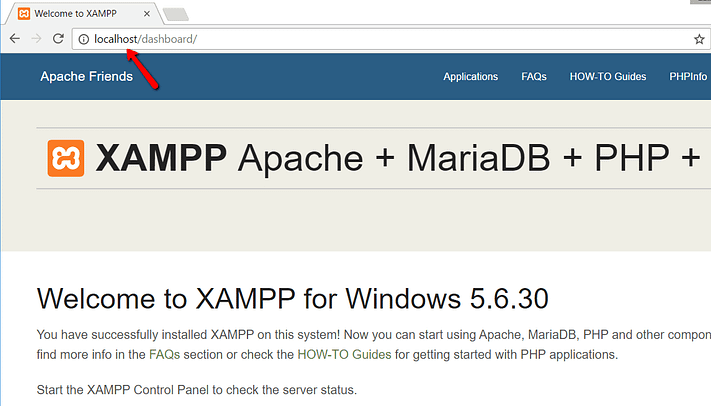
If all went well, you now have a functioning XAMPP server on your Windows PC! But now it’s time to install XAMPP and WordPress. So here’s how to get a WordPress site up and running on XAMPP.
Step 3: Add the WordPress files
If you’ve ever manually installed WordPress, the rest of the process should feel pretty familiar. First, you need to go to wordpress.org and download the latest version of WordPress.
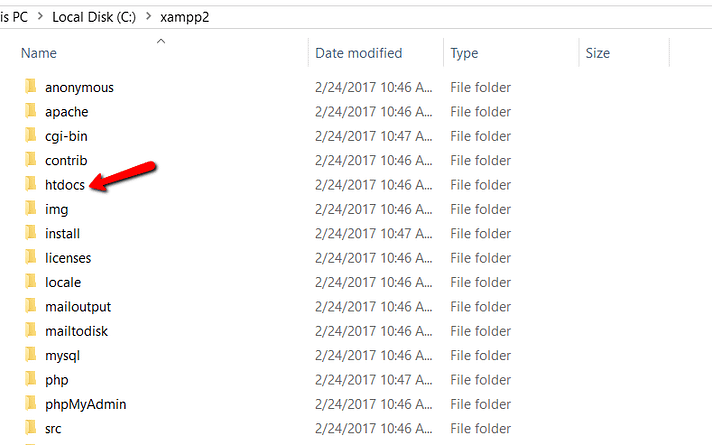
Then, in Windows, navigate to the folder where you installed XAMPP. For me, that’s C://xampp. It should be something similar for you. Then, in that folder, find the htdocs subfolder:
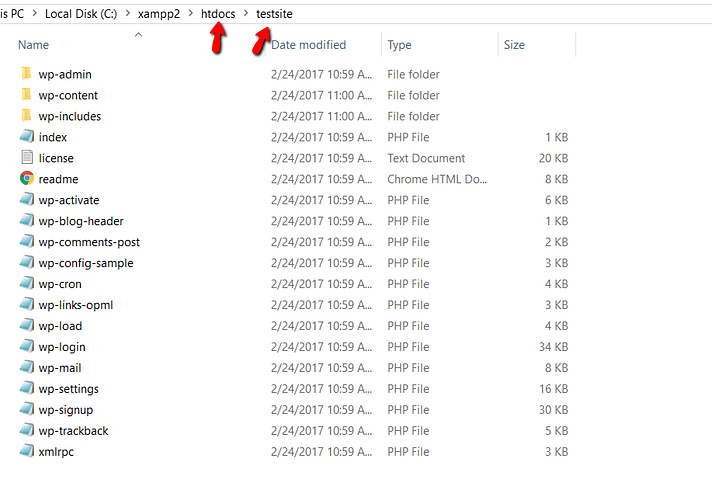
In htdocs, create a new folder for your test site. This folder name will become the sub-name used to access your site. For example, if you make the folder testsite, you’ll access your site by going to http://localhost/testsite.
Once you create the folder, extract the WordPress .zip file you downloaded from wordpress.org into it:
Step 4: Create a database for WordPress
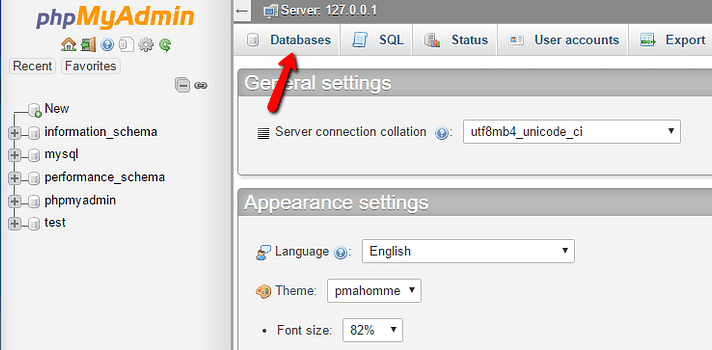
Next, you need to create a MySQL database for your WordPress install. To do that, launch PHPMyAdmin from your XAMPP control panel:

Then click on Databases at the top:
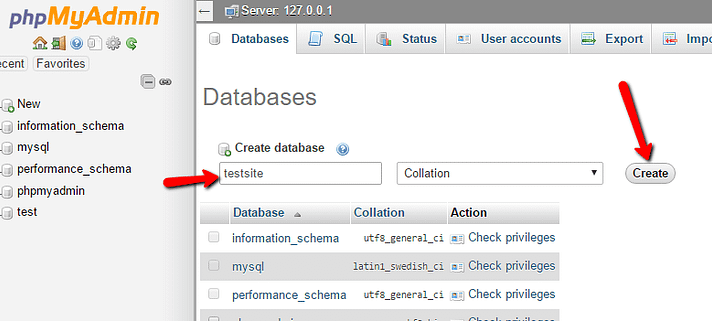
And enter a name for your database and click Create. Your name can be anything – just remember it because you’ll need it for the next step:
Unlike installing WordPress on a live web server, when you install XAMPP and WordPress, you don’t need to worry about creating a database user.
Step 5: Install WordPress locally via the on-screen installer
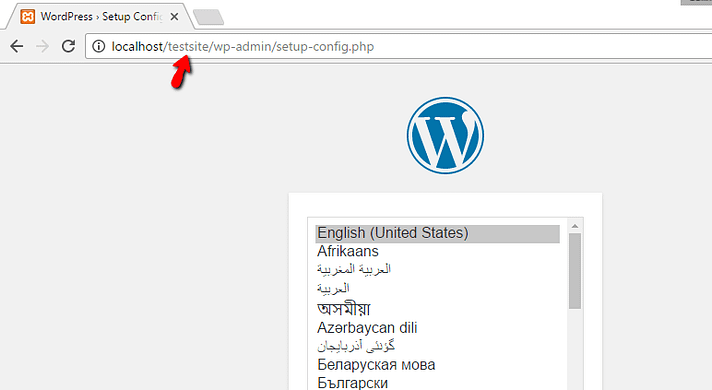
When you visit your test site, you should see the normal WordPress installer. Remember, your test site is just http://localhost/FOLDERNAME:
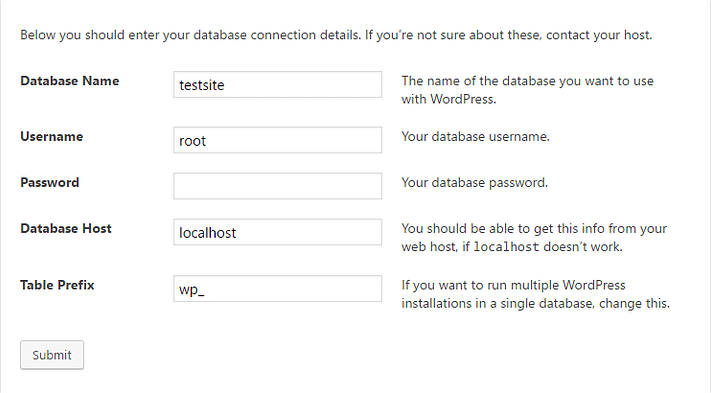
The only step where this process will differ from a normal install is the database details. When you get to the database details, enter them like this:
- Database Name = Name of the database you created in PHPMyAdmin
- Username = “root”
- Password = leave blank
Then finish the rest of the WordPress install process like normal.
Once you complete the process, you should see your brand new WordPress install running perfectly on your local host:
2, Static IP and port Forwarding
Port forwarding can help you to remotely access at-home devices and computers from another location. You may think port forwarding a router is super hard and only a geek with 170 IQ can do it, but trust me, it’s simple. All you have to do is type in a few numbers and it will be over in a heartbeat. Here’s how:
Step 1: Log in to your Netgear router IP settings page on your web browser.
Step 2: Choose Advanced > Advanced Setup > Port Forwarding/Port Triggering > Add Custom Service.
Step 3: Enter a device name, the starting port number, and the external port.
Step 4: Select TCP/UDP if you have no clue how to choose a protocol.
Step 5: Type the IP address of your device.
Step 6: Select Apply and you are done.
Plus if you have no clue how to check your IP address, use this link and find out right now. Besides your IP address, we will tell you the name of your internet service provider and current location. Cool, right? /
3. Point the static IP with the Domain
1. first, log in to your domain panel and go to the DNS Management


Now your server is connected to a live server, If you have any question, please comment I will replay